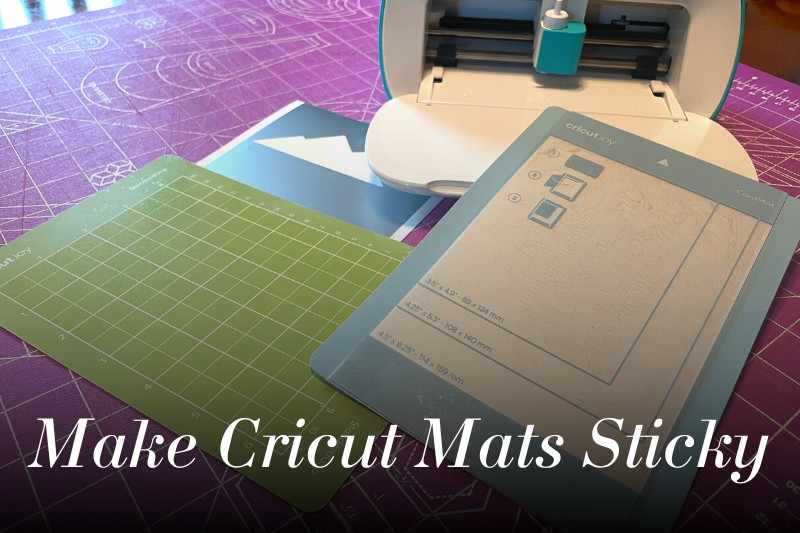
As a Cricut owner, you know how heartbreaking it can be to throw away a perfectly good mat just because it’s starting to lose its stickiness. If you’re wondering how to clean a Cricut mat, and how to make Cricut mats sticky again, you’re not alone.
Whether you’re creating paper crafting masterpieces or an incredible new heat transfer vinyl craft project, the right tools make the job easy and fun.
Cricut mats can be cleaned and reused very easily with the right cleaners and techniques. Cleaning a Cricut mat with a gentle cleaner every few uses can extend its life dramatically. When it’s time to make a Cricut mat sticky again, applying new adhesive can be another great way to extend its use.
Cricut mats are heavy-duty plastic boards used for holding your project as it goes through the Cricut machine, and they’re quite tacky to the touch, which lets you stick your paper, vinyl, or whatever material you’re using to the mat. You want a flawless cut, and you don’t want to waste any of your precious crafting materials.
Cricut mats are intended to keep going for around 25 to 40 uses, but a clever crafter can squeak a bit more life out of these babies. If you clean them regularly, and properly, you can make them last so much longer.
Let’s talk about how annoying it is when a mat loses its stickiness to put us in the mood to learn a few great tips for cleaning as well as how to restick a Cricut mat.
Table of Contents
Warning – don’t void your warranty!
If you’ve purchased your Cricut within a year of reading this article, you’re still within the warranty period offered by the manufacturer. Clean with care for this single, important reason.
Cleaning your Cricut mats is actually discouraged by the manufacturers of Cricut, and it can void your warranty in many cases. If you have an issue with your machine down the line, it may be difficult to access this warranty. You can still clean your mats, but use the gentler options.
If you bought your Cricut second-hand or from any other third-party retailer, you’re naturally not going to have a manufacturer’s warranty. It’s even more important for you to be careful, since damaging the equipment will mean buying something new.
Why do Cricut mats stop sticking?
After normal use, your Cricut mat will begin to lose some of its stickiness.
Cricut mats stop sticking when they become worn out. Use after use slowly erodes the adhesive off of the mat, and dirt, scraps, and residue build-up. Although you won’t notice it at first, bit by bit your mat loses its stick. After a few months or up to 50 uses, your projects won’t stay in place.
Many crafters – including you! – become fed up with their Cricut cutting mats, and for a good reason. We pay good money to buy one of those mats. And, while they’re amazing, we often find ourselves wanting more value for our money.
You can always buy a new Cricut mat when the old one stops working. But, that would mean spending more of your hard-earned money. Instead, why not try some of our tips first?
In our article, we’ll teach you how to clean your Cricut mat and then re-apply adhesive to have it working better than ever.
How to clean a Cricut mat
Your first line of defense against a worn-out Cricut mat is to give it a good cleaning.
Cleaning a Cricut mat doesn’t necessarily cut down on dirt. You don’t clean a mat because it is dirty. Rather, you want to clean it of the residue left over from crafting while preserving the adhesive if you can. There are a few great products and techniques you can try to clean your Cricut mat.
To clean a Cricut mat, follow these technique tips.
Light and gentle
Start it off with a light and gentle technique, removing the surface-level residue.
To clean a Cricut mat, apply gentle pressure in a circular motion. This will remove build-up without damaging your mat or taking away more stickiness. That’s the opposite of what you want. Residue and crafting debris block the adhesive from working, so try this technique first.
Simple scrub
If you have utilized your mat over and over and the tackiness is almost completely gone, the surface may require light, simple scrubbing.
To scrub a Cricut mat, rub a little measure of dish cleanser and warm water over the surface and scrub it lightly with a delicate brush, like a suede shoe brush. Anything with soft, fine fibers will work well. After that, wash the surface off with warm water and wipe it with a microfiber towel.
Lint roller
A great idea for older, dirtier mats is to start your cleaning with a lint roller. It’s an incredible method to get rid of large fragments or bits of paper stuck to the mat.
Older Cricut mats may be very, very dirty, so begin by using a lint roller to pick up the largest particles. Simply roll the lint roller along the mat, changing the paper when necessary. After you’ve lint-rolled, you can use gentle, circular motions with warm, soapy water to continue cleaning.
Degreaser
If your mat is exceptionally messy and has no stickiness to it at all, you need to break out the big guns and use a degreasing spray.
Degreasers have chemical substances to remove heavy dirt easily. A quality degreaser will go through any dirt with just one swipe. Never forget to clean your Cricut mat with soap and water after using a degreaser. After all, you don’t want those chemicals staying on your mat.
Using a solid degreaser will likely remove a lot of the remaining adhesive, as well. But, that’s okay since we’re going to be putting new adhesive on after we’re all finished cleaning it.
Best products for cleaning Cricut mats
Now that we’ve talked a little bit about techniques and some basic products, we’d like to get more specific. Here are some of the best products for cleaning Cricut mats, according to experienced makers.
Please note, you should always allow a mat to dry completely for an hour to two hours. Your mat won’t be sticky immediately after you clean it, but the stickiness will come back as the mat dries. If it doesn’t become sticky, then you’ll need our tips on applying new adhesive.
How to clean a Cricut mat with Dawn
Cleaning a Cricut mat with Dawn is totally simple, and you probably already have this soap sitting next to your sink.
To clean a Cricut mat with Dawn, mix a few drops in warm water and apply using gentle, circular strokes. You can put the mat under running water, using your fingers to rub the mat. You can even scrape with your nails, but avoid a sponge with rough bristles and hot water, as both can damage the adhesive.
How to clean Cricut mat with baby wipes
Another great option for cleaning a Cricut mat is a baby wipe. Makers Gonna Learn has a great video breaking this process down.
To clean a Cricut mat with baby wipes, use a gentle, circular motion. Baby wipes are one of the most effective methods of cleaning Cricut mats. Select a fragrance-free baby wipe without a lot of chemical additives so you’re not covering your cutting mats with extra creams, oils, or solvents.
Baby wipes are great to maintain your new mats. Wipe down a Cricut mat with a baby wipe after every use using delicate strokes to make it last much, much longer.
How to clean Cricut mat with LA’s Totally Awesome
LA’s Totally Awesome is a go-to product for a very good reason. It’s incredibly cheap at your local dollar store and effective, too.
To clean a dirty Cricut mat with LA’s Totally Awesome, you’ll need a rubber or plastic scraping tool. Spray Awesome evenly on the mat, and let it sit for five minutes. Lightly scrape with your tool, being careful not to push too hard. The adhesive might come up if the pressure you use is too firm.
Makers Gonna Learn cautions heavily against doing this if you’re worried about removing the adhesive. However, it is one of the best, most effective ways to totally clean your mat. If you go this route, definitely pay attention to our section on reapplying new adhesive.
How to clean Cricut mat with Magic Eraser
Magic Eraser is a cult product, used to clean everything from walls to sneakers. Magic Erasers, which contain bleach, are great products for tough stains.
To clean a dirty Cricut mat with Magic Eraser, get your sponge material a little wet and scrub as you normally would. It’s really easy to clean a Cricut mat with Magic Eraser because you don’t need soap or other products, and the bleach will work to remove a deep or stubborn stain.
How to clean a Cricut mat with Windex
The last product we want to talk about is Windex, a great choice since you probably already have it sitting in your cleaning cabinet.
To clean a Cricut mat with Windex window cleaner, spray an even coating onto the mat. Let the Windex sit on the mat for about five minutes, then scrape with a rubber scraper or plastic scraper. Even a credit card will work. Be careful that no adhesive or color peels up from the mat itself.
Proactive cleaning for a Cricut mat
There’s one big takeaway you should understand by now, and that’s the importance of being proactive in your Cricut mat cleaning.
Proactive cleaning is important for the long life of your Cricut mat. It’s easier to spot-clean mats with Dawn or baby wipes than it is to gently scrape away at months’ worth of dirt and build-up. Don’t let your mat get too dirty. Otherwise, you will need to risk the adhesive by using chemicals to clean it.
Of course, we all need a little help sometimes. If you’re totally rehabbing your mat from scratch, you may need to apply some adhesive to your Cricut mat to get it working again. Let’s talk a little bit about that process.
How to store Cricut mats
Spend a little time storing your Cricut mats carefully, and you’ll find cleaning becomes a whole lot quicker and easier.
To store Cricut mats, make sure you are replacing the protective, plastic cover after every crafting session. If your Cricut came with a tote bag, there is a special pocket inside for storing mats. You can also place them in a box or hang them. Many like hanging their Cricut mats to reduce dust.
Store your Cricut mats with care, and you’ll find you need to replace them far less frequently! After all, things that are left out might attract curious children or pets.
How to Make Cricut Mats Sticky Again
If you’re stuck with a mat that’s clean but totally smooth, you want to spend a little time trying to make it sticky again.
To make a Cricut mat sticky again, you’ll need to apply a mild adhesive formulated for this specific purpose. Tape off the sides so you don’t get glue where the Cricut’s rollers will go, and apply your adhesive according to the directions on the package. Allow it to dry and use as normal.
Clean your Cricut mat
We’ve talked about this at length, but of course, the first step to making a Cricut mat sticky again is to thoroughly clean it.
If you’re applying new adhesive, you can feel free to use whatever method is best to remove dirt from your Cricut mat. Many gentle tactics attempt to preserve the existing adhesive. Use your judgment, and consider scraping the mat with a plastic tool for the best, most thorough clean.
Tape the sides
You want adhesive everywhere except for the border of the mat, since that’s the part that will go through the Cricut’s rollers. To guarantee that you don’t get any glue in this area, you should tape them off before applying adhesive.
Tape off the side border of the Cricut mat with painter’s tape or masking tape. Follow the outline of the Cricut mat grid and carefully apply the tape. Overlap the outline a bit to be sure you won’t get glue on your rollers when it comes time to use the mat. Leave the tape on until the adhesive is dry.
Apply adhesive
Applying glue is an effective way to make the mats sticky again, but you have to use the glue appropriately.
To make a Cricut mat sticky again, apply the adhesive to the full grid of the Cricut mat. Everywhere you have not taped off should be a space where your projects might go. Utilize broad, even strokes and go smoothly over the mat, covering it entirely. Promptly wipe any spills, and allow it to dry.
Best spray adhesive for Cricut mats
There is an assortment of glue items that individuals use to revive their mats. They are accessible from craft stores and online retailers.
The best adhesives for Cricut mats will allow you to achieve an even coat of at least two layers. The glue will temporarily adhere to your project, not permanently. Products like fabric adhesives and even tacky glue can work well. Allow the glue to dry and then test it, patting it with a towel if it’s too sticky.
The most recommended spray adhesives in the crafting community are:
- Loctite 100 Repositional Spray
- Spray n Bond Basting Adhesive
- Aleenes All Purpose Tacky Adhesive Spray
- Krylon All-Purpose 7010 Spray Adhesive
I have to say that Krylon is always on our shelf at home. During art classes, it was in every fellow art student’s box. It’s a good brand, and it can be used for almost any craft.
How to make a Cricut mat sticky again – final thoughts
We hope you enjoyed reading our tips for cleaning Cricut mats and making Cricut mats sticky again. Taking care of a Cricut mat from day one is the best way to increase the life of your mat and ensure you won’t be needing a new one for a long, long time.
Cricut products are well made, but we do need to remember to take good care of them. Always remember to cover your Cricut machine when it’s not being used, and put accessories away carefully.
Cricut mats aren’t cheap, and more importantly, we never want to create unnecessary waste by throwing them away before we absolutely have to. Being a good steward to your tools and your Cricut machine will pay off in the long run.
Let us know in the comments if you have any tips we didn’t mention.