Felt balls are probably among the most appealing yarn products you can make, and you’ll be shocked when I tell you how easy they are to create. Whether you’re displaying them as decorations on their own, or using them in other projects, learning how to make felt balls is a skill that you will use over and over.
The softness, bounciness, and attractive look of hand-made felt balls make them playful decorations, and they’re one of my favorite things to use in other projects. They’re not just a staple of seasonal decoration but can also be used to bring colorful, all-season texture to your home.
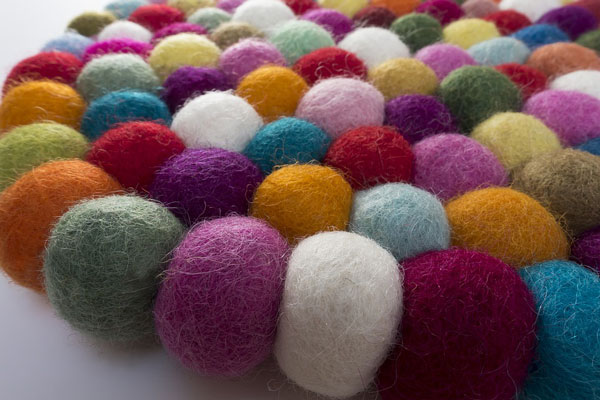
A felt garland can look particularly lively in a child’s bedroom or bring a pop of whimsy to your gallery wall. Felt balls can be arranged in glass vases and jars or in a bowl on your coffee table. Really, a felt ball is a great addition to any room. Their warm, fuzzy texture lends touchability and softness to any of your displays.
If you want a felt ball of your very own, don’t buy it. Felt balls in stores, especially a pre-made craft, can be needlessly pricey! Instead, learn how to make them. The process is fun, engaging, and you’ll feel twice as proud showing off your decorations to friends and guests.
I’m going to show you everything you need to make felt balls and teach you the simple steps to follow to create flawless and fun decorations.
Sound like fun? Let’s get going!
Materials to Make Felt Balls
The ingredients to make a felt ball are simple and easily found in the store. They are:
- Felting wool (it should be at least 50% sourced from animal fibers)
- A bucket of warm, soapy water (fragrance and dye-free)
- A bucket of cold water
- A towel
- Scissors
The felting wool can be replaced by colored polyester felt if you want to go for a more vegan-friendly approach. While the materials are relatively similar, the polyester does not achieve the felt state the same way wool does, but it’s a great option for those who have allergies or avoid animal products!
Bear in mind, polyester felt can be less forgiving to make. You can make a mistake here and there with wool, but polyester tends to become “overworked” more quickly.
Once you’re done collecting these materials, you’re free to start the felt ball making process.
Step-By-Step Guide: How to Make Felt Balls
You have your ingredients gathered, and you’re ready to create beautiful felt balls! Follow these instructions for a flawless craft.
Step 1: Separate the Wool
Take as much wool as you would like to form your ball and fluff it with your fingers to make an airy, light texture. Do this very gently so you don’t accidentally tear any chunks of fiber out. If you need to cut your wool, try to avoid cutting it in small portions. You don’t want your material to separate in the water.
Remember, wool tends to shrink quite a lot once it’s wet – so be sure to use a lot of felt if you want a large ball! It’s going to take you a few tries to get the hang of deciding how much you like to use. My advice for now would be to use more than you think you’ll need, and then you can adjust your next balls according to how you like them.
Step 2: Shape the Wool
Dunk your hands in the soapy water. Begin wrapping the wool into a ball with your hands, gently introducing the soapy water as you coax your wool into shape. Scrunch the wool with your fingers and pat with the palm of your hand.
You may notice a lather on your felt ball – that’s good! You want your felt to always be warm and wet but never totally soaked. You’ll develop a knack for the technique as your practice, so don’t be discouraged if your first one is less than perfect.
Dip your felt balls into the soapy bucket. The water will have a slight reaction with the yarn, shrinking it. Don’t panic! This is what you want. The shrinking will allow you to manipulate the ball, creating a more perfect shape.
Step 3: Roll the Ball
Roll the felt ball between the palms of your hands in gentle clockwise and counterclockwise motions. Gradually continue to dip the ball into the warm, soapy water another time or two in between rolling, working your way towards your ideal shape.
Continue rotating the ball to make sure you are rolling it evenly on all sides. Begin adding more pressure with your hands. If you notice your ball is beginning to look flat, that means you need to ease up a bit for now. Continue soaping and rolling the ball until it begins looking like the correct shape.
Step 4: Squeeze the Water
Once you have a round felt ball that is becoming dense, it’s time to get all of that wonderful, soapy water out! Squeeze it out using a high pressure version of your rolling technique. Try to keep the rounded shape you worked so hard for, but don’t worry if you accidentally squish it.
As long as the ball is wet, it can be reshaped. Dunk your felt ball into the cold, clean water and continue rolling it until your lather begins to go away.
As you’re doing this, you’ll notice the wool will start to felt and soften up while becoming denser. You’re getting very close to your end result, so stay patient!
Step 5: Wash the Felt Balls
Finish by rinsing the balls with cold water, swishing them around to extract the last of the soap. Be sure to keep an eye out for that rounded shape as you give them a firm, last squeeze. Don’t be afraid to apply a lot of pressure here! Now that your felt ball is nice and dense, it will hold its shape much better than in the beginning.
Try to get as much water out as possible, but don’t worry too much. They’ll spend some time air drying, so you don’t have to get them perfect.
Step 6: Dry the Felt Balls
Now you can leave the balls to dry. Give them a final check before walking away to make sure they’re in the shape you want, since you won’t be able to keep shaping them once they’re dry.
In about a day, they should be dry enough for you to use. Keep them as they are, use them to fill a fun container, string them up on your wall, glue them into fun shapes, or anything else you can think up!
What to Do With Felt Balls
The easiest part of a felt ball craft is making those fun, soft, squishy shapes. They take no more than thirty minutes of work and about a day to dry. Then, you’ll have exquisite-looking and super-soft felt balls to enjoy and work with.
There are endless possibilities for felt balls to the mind of a creative crafter. I’ve mentioned garlands and centerpieces to you in this guide, but how about toys for children? Felt balls make a great alternative to plastic fruit in a child’s grocery store game.
Give felt balls as gifts! Felt balls and felt ball crafts make incredibly thoughtful, personal gifts, especially during the holidays. Fashion them into Christmas tree ornaments or arrange them with silk flowers, ribbon, and other baubles into a seasonal wreath.
I like to decorate with felt balls in my table centerpieces to add a touch of playfulness and texture to my displays. I can choose whatever colors I like to match candles, seasonal flowers, and so much more. Different sizes, colors, and even tinsel mixed into the balls keeps things lively and interesting! What will you do with felt balls?